
How to Build Your Own PC?
Building your own PC in 2025 can be an incredibly rewarding experience. With the latest advancements in technology, you can create a custom-built machine tailored to your specific needs, whether for gaming, productivity, or creative tasks. In this comprehensive guide, we will walk you through every step of the process, ensuring you have all the information you need to assemble your dream computer.
Why Build Your Own PC in 2025?
Building your own PC offers several advantages:
- Customization: Choose components that meet your performance and aesthetic preferences.
- Cost-effectiveness: Save money by selecting parts within your budget.
- Upgradeability: Easily replace outdated components to stay current with new technology.
- Learning Opportunity: Gain valuable knowledge about computer hardware and assembly.
Step 1: Determine Your Purpose and Budget
Before purchasing any components, it’s essential to define the primary purpose of your PC:
- Gaming: Prioritize a high-performance GPU and CPU.
- Productivity: Focus on a powerful CPU and sufficient RAM.
- Content Creation: Emphasize a strong GPU, plenty of RAM, and fast storage.
Establishing a budget is equally important. Decide how much you are willing to spend and allocate funds accordingly to the most critical components for your needs.
Step 2: Select Your Components
1. Processor (CPU)
The CPU is the brain of your PC, so choose wisely. In 2025, AMD and Intel are the leading brands:
- AMD Ryzen 7000 Series: Known for excellent multitasking and gaming performance.
- Intel 14th Gen Core Processors: Offers cutting-edge single-core performance for gamers.
2. Motherboard
Select a motherboard that matches your CPU socket and supports the features you need:
- Chipset: Choose a chipset that aligns with your CPU (e.g., B650 or Z790 for AMD and Intel, respectively).
- Expansion Slots: Ensure the motherboard supports future upgrades like extra GPUs or M.2 drives.
3. Memory (RAM)
Opt for at least 16GB of DDR5 RAM for smooth multitasking. For gaming or content creation, consider 32GB or more.
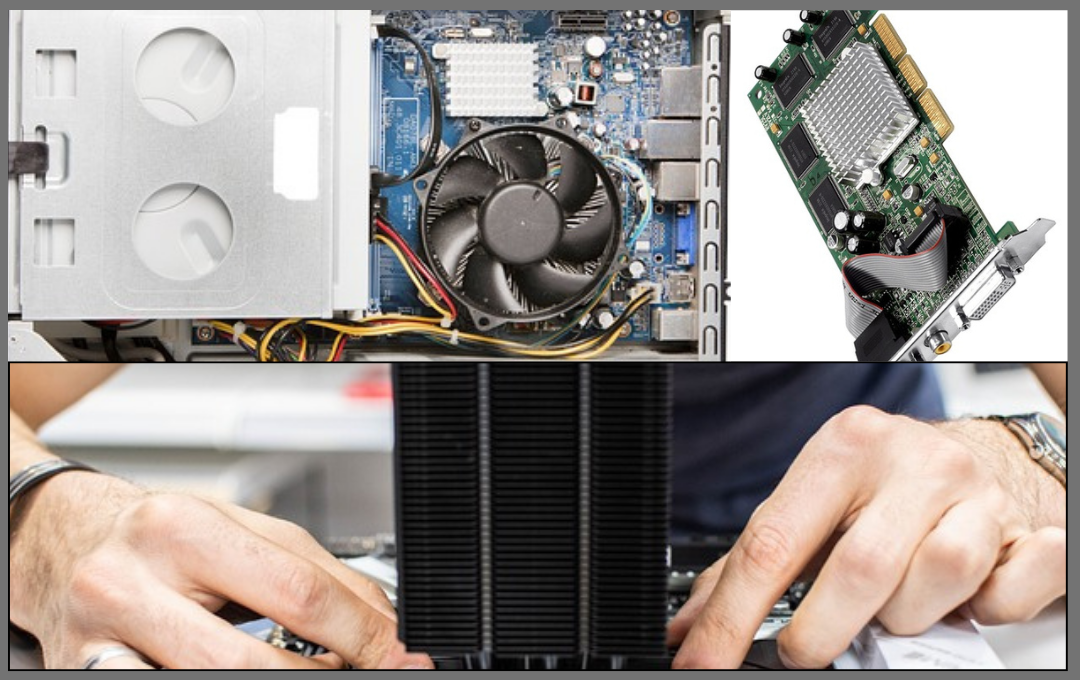
4. Graphics Card (GPU)
For gaming and 3D tasks, a powerful GPU is crucial:
- NVIDIA RTX 4000 Series: Delivers exceptional ray tracing and AI-powered features.
- AMD Radeon RX 7000 Series: Offers competitive performance at a lower cost.
5. Storage
Combine SSDs and HDDs for optimal performance and storage:
- NVMe SSDs: Provide lightning-fast boot times and load speeds.
- HDDs: Ideal for bulk storage of media and files.
6. Power Supply Unit (PSU)
Choose a PSU with enough wattage to power your system. Look for:
- Efficiency Ratings: Aim for 80 Plus Gold or higher.
- Modular Design: Makes cable management easier.
7. Case
Select a case that fits your components and offers good airflow. Consider cases with cable management features and room for future upgrades.
8. Cooling System
Proper cooling ensures your PC runs efficiently:
- Air Cooling: Affordable and reliable for most builds.
- Liquid Cooling: Ideal for high-performance systems needing extra thermal management.

Step 3: Gather Tools and Prepare Workspace
You will need the following tools:
- Phillips-head screwdriver
- Anti-static wrist strap (to prevent static damage)
- Cable ties for organization
Prepare a clean, well-lit workspace with enough room to organize your components.
Step 4: Assemble Your PC
1. Install the CPU
- Open the CPU socket latch on the motherboard.
- Align the CPU with the socket and gently place it in.
- Secure the latch and apply thermal paste if not pre-applied.
2. Attach the RAM
- Open the RAM slots by pushing back the clips.
- Align the RAM stick with the slot and press firmly until the clips snap into place.
3. Mount the Motherboard
- Place the motherboard inside the case, aligning it with the standoff screws.
- Secure it with screws provided with your case.
4. Install Storage Drives
- Mount SSDs and HDDs in their designated bays.
- Connect them to the motherboard using SATA or M.2 connectors.
5. Add the GPU
- Remove the appropriate expansion slot covers on the case.
- Insert the GPU into the PCIe slot and secure it with screws.
6. Connect the PSU
- Mount the PSU in its designated compartment.
- Connect the power cables to the motherboard, GPU, and storage devices.
7. Cable Management
- Organize cables using the case’s built-in routing features.
- Secure cables with ties for a clean look and improved airflow.
Step 5: Power Up and Install Software
1. Boot the PC
- Connect your monitor, keyboard, and mouse.
- Turn on the PC and ensure all components are functioning properly.
2. Enter BIOS
- Press the designated key (e.g., F2 or DEL) during startup to access the BIOS.
- Check that all hardware is recognized and configure boot priorities.
3. Install the Operating System
- Use a bootable USB drive to install Windows or your preferred OS.
- Follow the prompts to complete the installation.
4. Install Drivers and Software
- Download and install the latest drivers for your GPU, motherboard, and other components.
- Install essential software, including antivirus and productivity tools.
Step 6: Test and Optimize Your PC
Run benchmarking tools to test performance and ensure stability:
- Cinebench: Tests CPU performance.
- 3DMark: Evaluates GPU capabilities.
Adjust settings in the BIOS or software utilities to optimize performance, such as enabling XMP for RAM.
Conclusion
Building your own PC in 2025 is an exciting and fulfilling endeavor. By carefully selecting components, following the assembly process, and optimizing your system, you can create a machine tailored to your exact needs. Whether you’re a gamer, professional, or enthusiast, the satisfaction of building a PC is unmatched.
Frequently Asked Questions (FAQ)
1. Why should I build my own PC instead of buying a pre-built one?
Building your own PC allows you to customize it according to your specific needs, save money by avoiding unnecessary features, and ensure easy upgradeability in the future. It also provides a better understanding of how your computer works.
2. What tools do I need to build a PC?
You will need a Phillips-head screwdriver, an anti-static wrist strap to prevent static damage, and cable ties for organizing cables. Optional tools include a flashlight for better visibility and a magnetic tray for holding screws.
3. How much does it cost to build a PC in 2025?
The cost depends on your requirements. A budget build can start around $500-$700, while high-end gaming or content creation PCs can cost $2,000 or more. Set a budget based on your performance needs.
4. How long does it take to build a PC?
For a first-time builder, assembling a PC may take 3-5 hours. Experienced builders can complete it in 1-2 hours. Additional time may be required for installing the operating system and software.
5. What should I do if my PC doesn’t turn on after assembly?
If your PC doesn’t turn on:
- Check all power connections, including the motherboard, GPU, and PSU.
- Ensure the power button on the case is properly connected to the motherboard.
- Verify that the PSU is switched on and functioning.
- Consult your motherboard’s manual for troubleshooting tips.
6. Do I need an anti-static wrist strap to build a PC?
While not mandatory, an anti-static wrist strap is highly recommended to prevent damage to sensitive components from static electricity. Alternatively, touch a grounded metal object frequently during assembly.
7. How do I choose compatible components?
Ensure compatibility by:
- Matching the CPU with a compatible motherboard socket.
- Checking that the motherboard supports your RAM type and speed.
- Ensuring your case fits your motherboard size (ATX, Micro-ATX, etc.).
- Verifying that the PSU provides sufficient wattage for all components.
8. What’s the difference between air cooling and liquid cooling?
- Air Cooling: Uses fans and heatsinks to dissipate heat; it’s more affordable and easier to maintain.
- Liquid Cooling: Uses a liquid coolant and radiators for efficient heat dissipation; it’s quieter and ideal for high-performance PCs but requires more maintenance.
9. Can I use old components in my new PC build?
Yes, but ensure the old components are compatible with the new ones. For example, older storage drives or GPUs can work if they match the interface (e.g., SATA for drives, PCIe for GPUs).
10. What operating system should I install?
The most common operating system is Windows 11, suitable for gaming, productivity, and general use. Linux is another option, especially for developers and those looking for a free alternative.
11. How can I ensure my PC remains cool during operation?
- Use a case with good airflow and multiple fans.
- Regularly clean dust from fans, filters, and heatsinks.
- Apply thermal paste correctly on the CPU.
- Consider liquid cooling for demanding systems.
12. Is it safe to overclock my PC?
Overclocking is safe if done carefully. Ensure your CPU and GPU have adequate cooling, and gradually increase the clock speeds. Monitor temperatures and stability using benchmarking tools.
13. How often should I upgrade my PC components?
Upgrade components based on your needs:
- Every 3-5 years: For gaming PCs to keep up with new titles.
- Every 5-7 years: For productivity PCs unless performance slows. Monitor technological advancements and assess whether your current PC meets your performance requirements.
14. What’s the best way to learn PC building?
Follow detailed online guides, watch video tutorials, and refer to manuals included with your components. Practice and patience are key to becoming proficient at PC building.
15. Can I build a PC without prior experience?
Yes, building a PC is straightforward with proper guidance. Take your time, follow a step-by-step approach, and consult resources like this guide to ensure success.


Just discovered gk999 and I’m kinda digging it. They’ve got a nice variety of options and it feels pretty legit. I’d recommend checking it out if you’re curious! Give gk999 a shot!